Showing posts with label projects. Show all posts

Saturday, May 26, 2012

Onesie Door Hanger

Here is my latest creation!   A sweet friend at work is expecting her first grandchild and wanted something special to go on her daughter's door.   The nursery is going to be lavender, so I thought a lavender onesie would be a cute decoration.    She loved it!!   The fun door decoration is made out painted canvas and was really simple to do.   I will be adding this design to my Cleverly Creative Girl Shop on this website.   Other colors and styles available.  Please let me know if you need one of these cute designs for your next baby shower or new addition!  

Have a blessed day!

Melony
aka Cleverly Creative Girl

Tuesday, March 27, 2012

"He is Risen" Framed Scripture


"He is Risen"

Since Easter is only a couple weeks away, I wanted to make a few things to celebrate. I found this quote here and loved it so much, I decided to make a piece of framed art to put with my other Easter decorations. I love the way it turned out! I printed the scripture out in color and then framed it out with beautiful turquoise linen textured paper with a slight sheen to it. The paper is gorgeous! The picture definitely does not do it justice! Then I put it all in a classic white 8x10 frame and added a spring green plaid bow to the top. I love how fresh and clean it looks. I like the less traditional "Easter" look that it has. I am very pleased with how it turned out.


Here is a close up of the print. Simple, yet elegant.

Here is one last close up of the picture. This photo really shows the beauty of the turquoise paper I used to mat around the scripture. Sorry for the glare, but it was the only way to get the true picture of what the paper looks like.

Have a blessed day,

Melony
"Cleverly Creative Girl"

Monday, February 6, 2012

All on a Sunday afternoon...

Getting My "Craft" On

This past Sunday afternoon, I decided to sit down and paint. I didn't have anything planned in particular. I just sat and stared at the blank canvas in front of me. For whatever reason, I decided to paint a cupcake. After all, cupcakes are quite trendy right now! lol


So this is what I came up with. Not bad for my first try at painting a cupcake, I guess. I love the fun colors. My daughter now wants to know if the cupcake will be hanging on the wall in her room now. Haven't decided that yet! Anyway, it was a lot of fun and I hope to paint even more cupcakes, etc, in the near future. Let me know if you need a cupcake for someone "sweet" in your life!


Here's another shot of the cupcake beside the Razorback I painted a few weeks ago. I'm working on some other designs for all you Razorback fans out there. Hopefully I will be able to finish it soon.

Then I decided to play with paint on a leftover foam board cross I had in my garage from last year's project of moss covered crosses. That plain cross had been staring at me all year! So I decided it was time to do something to it. I decided to paint some fun, whimsical flowers on it. Keep in mind, I am not done with it yet. This was all I had time for yesterday. I still have to add detail to the blue and orange flowers and then fill in the spaces with other designs. I think it's going to look so cool when I'm done. I love the fun spring colors, but I also think it would look great in just about any color.
Here is a close up of some of the flowers. Again, I still have more detail to add to them. It's definitely a work in progress. This is my "prototype" of future projects to come for Easter.

And finally, I decided to make a Valentine heart for MY door! I love the fun whimsy design this one has. Can't wait to get it finished and on my door.

Well, that's all I have for you today. Just a few fun projects from the weekend. I will be sure to post the cross when I get it finished. I think it's going to turn out great when it's finished. Hopefully this has inspired you to pick up a paint brush. You never know what you might create!

Blessings,
Melony


Saturday, January 28, 2012

Take Heart ... Valentine's Day will soon be here!


I love Valentine's Day for so many reasons! I am married to a wonderful man (love you, Baby), red is my favorite color, I love Valentine's candy and I also love to draw/doodle hearts, etc. So, to get in the spirit of things, lately I've been making several red burlap hearts to hang on your door for Valentine's Day. Working with burlap is so easy and it comes in so many colors. I used some leftover red burlap from Christmas to make several designs.

To make the large heart decorations:

1. Make a large heart pattern out of paper. Mine measured 24 in. wide by 21 in. long. Fold burlap so that it is double thickness, then you can cut both the front side and back side of the heart out at the same time. Trace the heart onto your burlap with chalk, which can easily be wiped off.

2. Cut out both layers of burlap at the same time. This will insure that the edges of both sides of your hearts will line up and make it easier when it comes time to join the two sides together.

3. Next, paint a design on your heart. I used acrylic paints. Because the red burlap is so dark in color, it tended to bleed through the white paint, turning it more of a pink color. But, since pink is a Valentine color, too, I didn't mind. I started off by painting white polka dots on all the hearts. In this example, I also added black dashes around the edges.

In this example I painted "Be Mine" free hand with black. I then realized that it was really off center, so I decided to make various swirl designs around the edges to make it less noticeable. This design turned out to be one of my favorites! So, don't get frustrated if you make mistakes, just turn it into something else!

In this design, I painted the wording, then decided to make a black and white check border. I started with painting a one inch wide black border around the heart. Then I let it dry.
Once it was dry, I went back with my white paint and painted one inch white squares on the black border. I think this really makes the borders "pop."

4. Once you have finished painting your designs and they have dried thoroughly, you can begin to join the front and back pieces together. I simply use staples to join them together. It's quick and easy. I stapled about every one inch. I found that if I stapled where it had been painted, it seemed to hold better. Staple a little more than 3 quarters of the way around, leaving an opening to stuff the heart.

5. Stuff the heart with waded up plastic grocery sacks until the heart is fairy firm. Then finish closing up the edges.

6. Next you need to add a way to hang the heart. I used both ribbons and wires. On the hearts with the painted edges, I used wire to make a hanger and then added ribbons to the top of the wire. For hearts without the painted edge, I make a hanger with ribbon and then tied extra ribbons in the center of the ribbon hanger.

Here are a few more examples of some of the hearts I designed. Because I work in a Christian school, I had requests for designs that spoke of God's love for us. I love the way they turned out!
(Sorry for the blurry picture!)

I am taking orders for hearts in the Little Rock area. If you would like for me to design a heart for you, please contact me via this blog, email (cleverlycreative@gmail.com) or by phone (501) 223-9515. The hearts are $25 each. Please contact me soon, as only a limited number are available. Thanks!

Melony
(aka Cleverly Creative Girl)


Monday, September 5, 2011

Football Spirit For Your Door

We've got spirit, yes we do!
We've got spirit, how 'bout you?


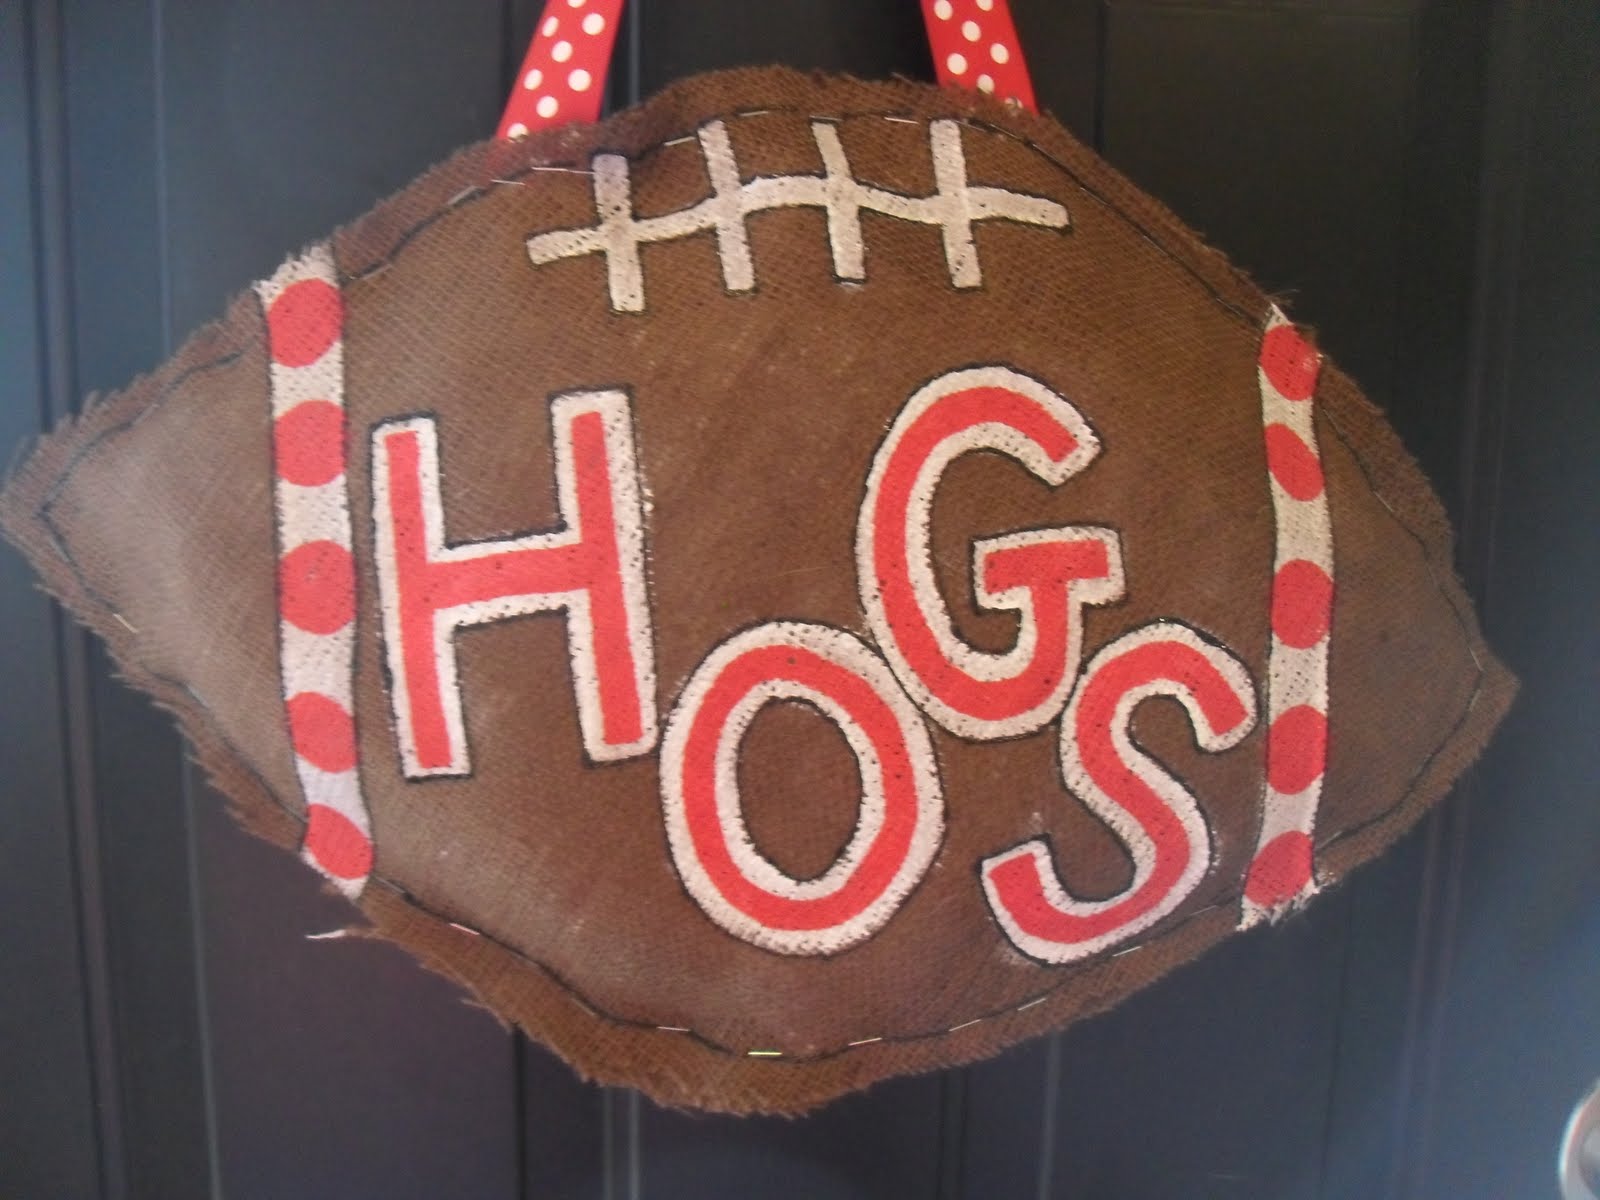
If you've been in stores or online lately, you've probably seen these cute football door decorations. They're everywhere! About a week, I got together with some of my creative friends, (Stacy, Amanda and Amanda's neighbor) and we made our own footballs. They turned out super cute and were fairly easy to make. They are made out of brown burlap, paint, ribbon, staples and plastic sacks (for stuffing).
Here is a close-up of the one that shows my Razorback support!


I also made one for the school where I teach and my children attend,
Little Rock Christian Academy. Go Warriors!!

I would be happy to make one for your team! They are $25 each.
Just let me know! Football season is here!
Don't forget to show your team spirit!!

Blessings,

Melony
Cleverly Creative Girl

Tuesday, August 16, 2011

Teacher Name Signs

It has been awhile since I did much painting, but I really enjoyed making this little project. This is my second year in the Rainbow Kids Room at my school and I decided I would make a sign for outside our classroom door as a gift for the teacher with whom I work. She loved it and I think it turned out great. The colors are so vibrant and the rainbow fits in perfectly with our theme.

The size of the canvas board is 12 x16. Once I decided on the design, I used a pencil to draw it in. I just used basic acrylic paints to add all the color. Then I used a black paint pen out outline all of the different colors in the painting. That gave it a much more crisp look. Then I added the name in the corner by cutting vinyl on my Silhouette machine. In the past I have had trouble getting the ribbon to attach to the back using hot glue and other options. So, this time I had my handy-dandy hubby use his drill to make two small holes in the top so that I could thread the ribbon through and tie in a bow. It worked great.

Here is a close up of the painting. Sorry that it's a little blurry. I was in a hurry. Again, this was a really fun project and hopefully I will get to make more for other people in the future. If you would be interested in a sign, just let me know. Prices vary based on size and design.

Thursday, August 4, 2011

Customized Clip Boards for Back-to-School

Here is the fun clip board I made for my son to take Back-to-School this fall. This was my first time to work with "mirror" images, so it was a fun adventure, but I think it turned out well. (All lettering is on the back side of the clip board so that the front of the clip board is smooth for writing.) The possibilities are endless with these clear clip boards. I'm currently working on one for my daughter with a "cheerleading" theme. I'll be sure to post the pictures of hers when I get it finished.

If you would be interested in a custom clip board for your child for back to school, just let me know. They are $15. I have just about any color vinyl imaginable and the design/lettering possibilities are endless! I have the clip boards in stock, so I can get it done before school starts.

Wednesday, August 3, 2011

Teacher Treats

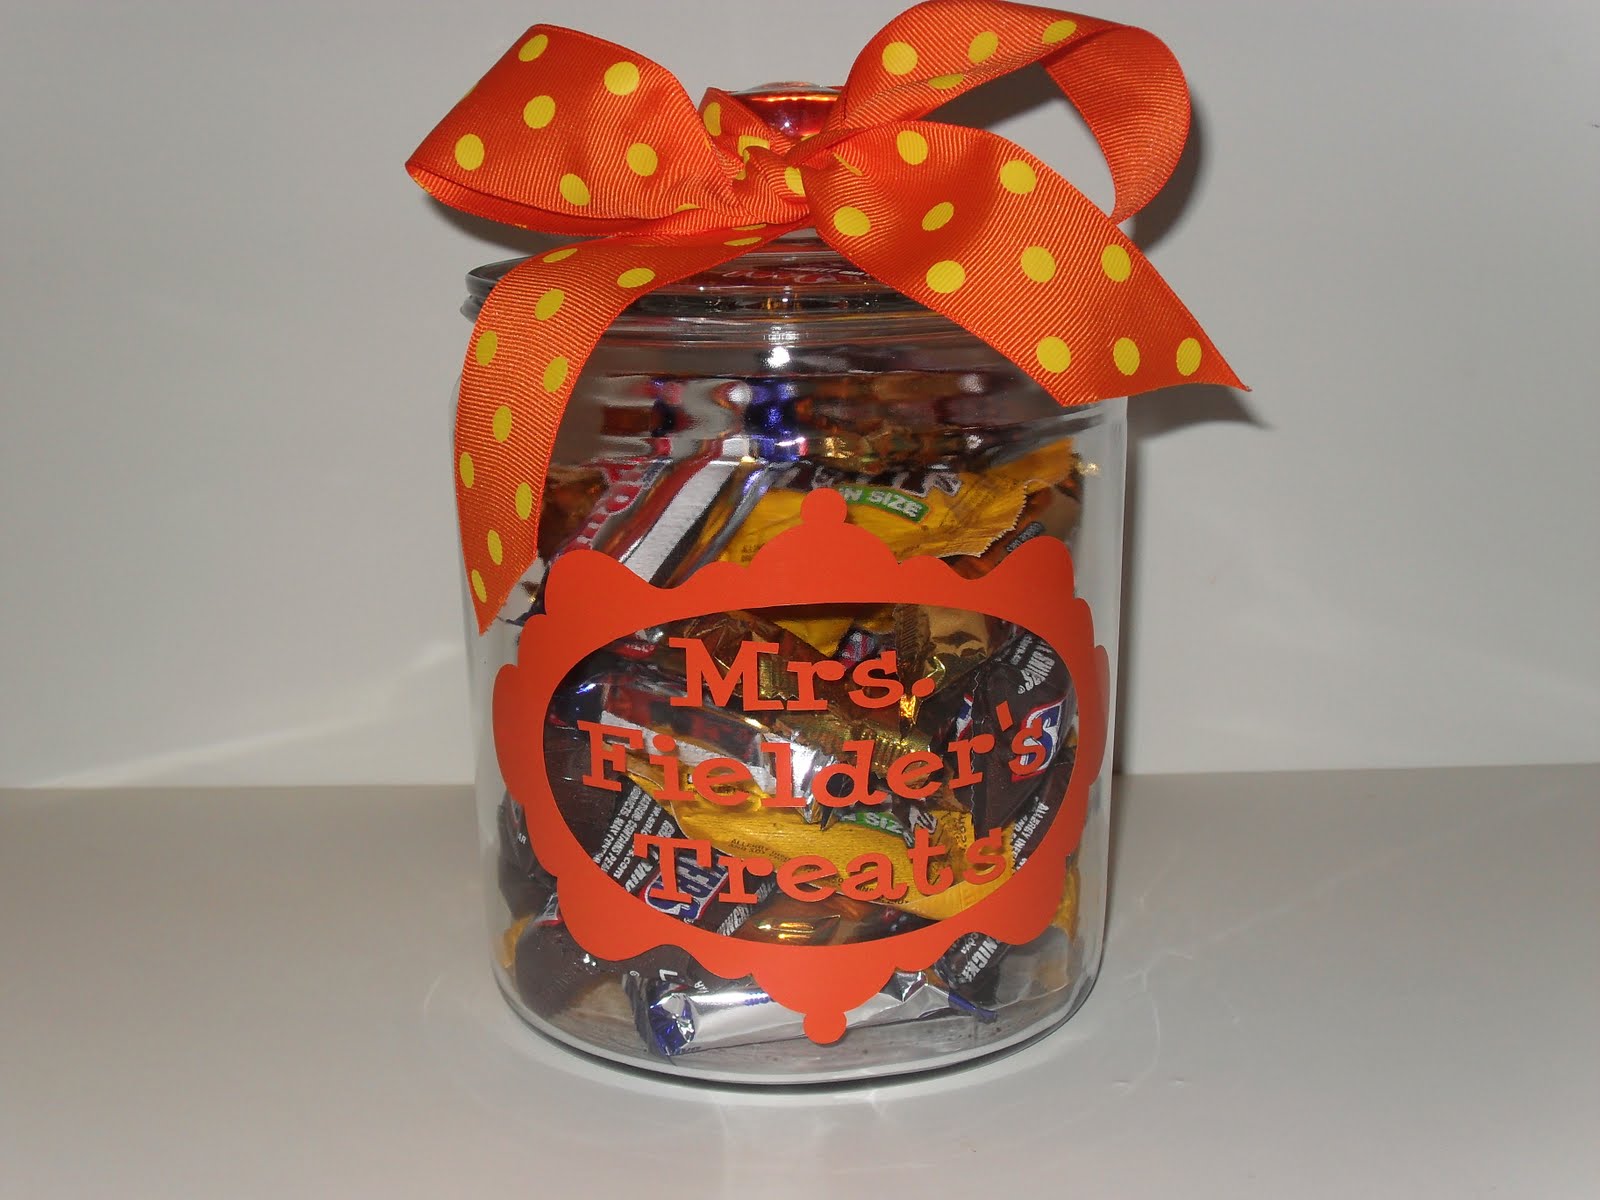
It's that time of year again! Time for all the kiddos (and their teachers) to head back to the classroom. I am gearing up for another year of kindergarten. The kids are so sweet and a lot of fun, but sometimes I just need an afternoon "chocolate break." So, this year I thought I would keep my own stash of chocolaty goodness at my desk...in case of "chocolate" emergencies, of course. Here is the cute little half gallon cookie jar that I decorated. I used my handy dandy Silhouette machine to cut the vinyl design and then just added a fun polka dot ribbon on top.

Next, I went to my local Kroger store and purchased several kinds of my favorite candy that were on sale. Thanks to this cute jar, I will have a special sweet treat to enjoy during my afternoon breaks. Now let's just hope that my own kiddos don't spot the candy and eat it before I even take it to school! Perhaps I'd better hide it...


If you would like for me to make you a cute little jar like this for your child's teacher on the first day of school, just give me a call! (501-223-9515) You can choose your color and design. The cost is $15 and the jar measures 8" high by 5.5" wide. (Candy and ribbon not included).

I will have more Back-To-School gift items posted in the next day or so. Perfect for new teachers, college students and first day of school "happy" gifts. Some of the items I am working on include: customized clip boards, buckets, plastic tubs, etc. As always, I can personalized items that you bring to me, as well. Contact me today for more information.

Friday, July 1, 2011

Let's Party!

One thing I LOVE to do is throw a fun party! In this case, it was my daughter's birthday. She decided to have a pool party and go with a Hawaiian theme. Thankfully the weather cooperated. I was worried because the day before the party, it rained all day! But, we had bright sunshine and HOT temperatures...perfect for a pool party.

Now normally when I plan a party, I plan it for weeks and have ev
erything ready to go, but this time was different. Due to scheduling issues with the pool, the party had to be 2 days after we got back from vacation! Yikes! (Note to self: don't plan a party for 2 days after you get back from a trip!) But, you do what you gotta do and it all turned out fine. Of course the perfectionist in me wanted to do so much more, but there just wasn't time. All in all, I think it turned out well and everyone seemed to have a good time. I thought I would go ahead and share some of my decorating ideas with you from the party. Nothing too fancy, mind you. Just "festive."

Here is a quick door sign I made. I literally whipped it up in a few minutes. I simply used a 12x16 canvas board, taped off areas to paint different colors, added polka dots with a large round sponge brush and added "Happy Birthday" in black vinyl letters that I cut with my Silhouette. Then I just added a ribbon to the back to use as a door hanger. The bright colors show up great from the street. I hung it out there a few days before the actual party. I chose not to put her name on the sign, so that I can reuse the sign for each family members' birthday week.

My next project was to try my hand at making tissue paper flower balls. I had never made them before, so decided to Google it and I found several You Tube videos that showed me exactly what to do. I tried to find the video tutorial that I used, but I was unable to find that specific one again. But, any tutorial you find will give you the instructions that you need. I used 10 sheets of tissue paper to make mine nice and full and I cut the edges of mine to a point (while still folded together), for a fun look. They were a little time consuming to make, but I just love what they added to the decor.

Having thrown several luau/Hawaiian themed parties in the past, I have lots of serving pieces, linens, etc that fit that theme. Which was good, since I was on a tight budge for this party! The grass skirt under the table cloth is actually a twin size bed skirt that goes with some Hawaiian bedding my daughter used to use when she was younger. It's the perfect size for my island! The "table cloth" is actually the twin flat sheet from the same bedding set. Yes, I said bed sheet! Why not? It had the perfect design and I already had it on hand.

I always like to try and challenge myself to see how much I can use from what I already have. I also kind of like the "mix and match" look. Nothing to "matchy-matchy." When I buy serving pieces, bowls, baskets, cloth napkins, etc, I try to buy things in fun colors that will work for a number of holidays or themes. I especially love reds, pinks, lime green and oranges. I love to use baskets with cloth napkins in them for serving pieces, especially for chips, bread, silverware or napkin holders, etc. The fun floral plates on the island came from Target years ago, and actually belonged to my sister-in-law, Terri. She put them in a garage sale we were having together and I snatched them up. I already have a hot pink set, but I knew the white set would come in handy too! (I know, I think I have a dish fetish!!) I'm sorry that the rest of the decorations/serving pieces didn't show up well in my pictures. Don't you hate it when you think you take enough pictures and you discover after the fact, that you didn't!!


Other fun serving pieces are buckets. Buckets in all sizes and colors. This little orange bucket came from the dollar spot at Target. (Love the dollar spot!) I simply added a hot pink and orange gingham cloth napkin and some bright turquoise plastic flatware for a splash of color.

I also love my white ribbon plate! I got it years ago, back when I was a Southern Living at Home rep. I wrapped a variety of pattern ribbons around the edge through the years. It's just such a fun plate and you can use dry erase markers to write a greeting or your menu. Too fun. Everyone should have one!


For party favors for the girls, I bought these fun tumblers at Target and used orange vinyl to put the girls' names on the cups. Then my daughter simply filled them with some of her favorite candy. Easy-peasy!

I didn't make the cake this time, but it was so cute, I thought I would show it to you anyway. Normally I made petite fours for my daughter's birthday, but I knew that just wasn't in the cards for this party. Thankfully she was fine with that and we happened to find this cake at Sam's that was perfect for our theme. It was so good and easy on the budget, too! Sweet!

Well, that's all I have for now. Like I said, this party was a little scaled back from what I normally like to do, but everyone seemed to have a good time. I hope you found this helpful and that perhaps you were able to get a few ideas from it. Thanks for taking the time to ready my post.

Have a great day,
Melony


Friday, June 17, 2011

Last Minute Father's Day Door Decor

Hey Y'all,

I can't stop making these quick and easy door decorations!! I was thinking about what I wanted to do for Father's Day this Sunday and I thought it would be fun to make something to go on my front door. So, once again, I turned to the quick and easy door decorations I've been making, as detailed in this post. What better to make for Father's Day than a giant tie!

Here are some pictures I took as I made this giant tie:


1. Take a piece of brown packing paper and fold it in half. Draw out the shape of a tie. Paint the tie your base color. In this case, I used a Leaf Green acrylic paint. Allow to dry.

2. Next, paint a design on your tie. I chose to paint big orange polka dots on my tie. Then you want to outline the tie with black paint.

3. Then I designed and cut out vinyl letters on my Silhouette machine that say "Happy Father's Day." If you do not have a cutting machine, you could simply paint the words on your tie or even use large stickers that you get at any craft store.

4. Cut out the tie, being sure to cut out both layers of paper at the same time. Then begin stapling the sides together until you work your way around the tie. Leave one side unstapled. Then stuff it with extra paper, grocery sacks, etc. Here I used the scraps that were left over from cutting out the tie. Waste not, want not! Then finish stapling up the tie.

5. Next attach a wire loop to the back of the tie (at the top) so that you can hang it on your door.

And there you go! A super easy (and inexpensive) Father's Day door decoration!

Happy Father's Day to all the Dads out there!

Monday, June 13, 2011

Monogram Wall Art


Now that school is out and I'm off work for the summer, I intend on making up for all the lost creative time during the school year. This may be my new favorite thing! This was my first attempt at painting something with a zebra print. Before today, I probably hadn't done any painting since before Christmas. Since I got my new favorite "toy" (aka Silhouette machine) a few months back, I've been monogramming all sorts of things. I decided that the walls in my bedroom needed a little something that was "fun," so I decided to try out this little project.

For this project, you will need:

12 x 16 canvas board
acrylic paints (I used Black and Caribbean Blue)
blue painters tape
paint brushes in various sizes
Silhouette machine
black vinyl
ribbon
ruler

1. Use your Silhouette machine to design and cut out your monogram. I made my monogram approximately 8" x 10.5". Peel off the negative space and transfer monogram to transfer paper. Set aside to use later in the project.

2. Tape off the borders of your canvas with blue painters tape so that you can paint the inside block a single color. I used Caribbean Blue. I made my borders 2" wide on the short sides and 1.5" inches on the long sides.

3. Paint the inside block of the canvas your desired color. Allow to dry and repeat with a second coat. Allow to dry completely and remove blue painters tape.

4. Next, lightly draw your desired design around your border. In this case, I drew zebra stripes.

5. Apply blue painters tape to the inside edge of your border. You will be putting the painters tape temporarily on top of the color you painted in the center earlier. Using painters tape will give you a clean, crisp edge for your border print.

6. Paint out your border design. In this case, I used black paint. This design is a little time consuming, but I love the effect. Allow to dry completely and remove the blue painters tape. Do any touch ups that are necessary.

7. Apply the monogram to the center of the canvas board, making sure that it is centered on all sides.

8. Attach some fun ribbon to the back as a hanger and you're done!


If this is too much work for you or not your cup of tea, I am selling these customized wall art pieces for $40. You can choose your colors and your border design (zebra, stripes, polka dots, etc). You can also put your name (first or last) instead of the monogram, if you choose. It is completely customizable. Just send me a quick email to melony.fielder@sbcglobal.net and I'll contact you to place your order!

Keep on creating!
Melony

Live All In

A few weeks ago, our church learned that one of our teaching pastors would be leaving to take a job with another church in California. While we are very sad that they will be moving away, I was struck by his obedience to God and God's will for his life, no matter the cost. A couple weeks ago, he delivered his final sermon at Fellowship. He talked about living "All In" for God, no matter where that may take you or no matter the cost.

He challenged us to look and see if our living is all about Jesus, or do we compartmentalize Jesus to certain areas of our life. Are we willing to serve and speak the Truth to others, no mater the cost? Are we committed to "doing life" in relationships with others? He reminded me that the greatest investment we will ever make is in people. Being in the lives of people, not just passing through. I wonder if sometimes I feel I am too busy, or afraid of rejection or sadly maybe even too lazy to really invest in the lives of the people God has placed around me. Then I wonder why it is that I feel alone at times. He encouraged us to love people enough, that when you have to leave them, you cry.

As I examine my life, I realize that I have not been living "all in." It's easy to make excuses for why we don't do this or that. But excuses do not matter to God. God didn't just ask us to "start," He asked us to "finish" the course. Are you living "All In" for Jesus? Are you invested in the lives of the people God has placed in your life? Are you willing to follow where Jesus calls you, no matter the cost? I have challenged myself to really start to "Live All In" for Jesus. I need to be more present in my life. Listening to Jesus' voice. Are you listening? Where is he calling you?


To remind myself that I want to "Live All In," I made this simple wall art. It's nothing fancy, but I'm hanging it just outside my closet, so that I will see it every morning when I get up. It will serve as a reminder to me of the re-commitment I want to make in my life, to Jesus and to those around me.

Have a blessed day everyone!
Melony

Wednesday, June 8, 2011

Easy Giant Flower Door Decor


For my first official post, I thought I would share a super easy way to make something fun for your front door. I love having decorations on my front door and I love to change them out regularly for all the various holidays/seasons. In order to do that, it has to be something relatively quick and inexpensive to make. This project uses very little supplies and doesn't require special tools or extensive crafting ability. I originally got this idea from my wonderfully artistic friend, Stacy, who shared how to make a giant pumpkin door decoration in this post.

I made this fun giant flower last week when I wanted something bright and summery to go on my door. Here is what you will need to make this project:

brown package mailing paper
acrylic paint
black sharpie
stapler
something to stuff it with (grocery bags, newspaper, etc)
ribbon

  1. First, start by lightly drawing your design onto your paper. I actually used the lid of a cookie jar to make the center of my circle. Then I took a piece of computer paper and cut out a shape for a petal. Then I simply traced the petal shape around the center circle, making sure that they petals overlapped quite a bit.
  2. Now the fun begins! Paint your flower in your favorite summertime colors. I chose a bright yellow for the center and hot pink for the petals. Make sure the colors you choose are bright and contrast with your door color. That way, your pretty flower will show up great from the street. (Note: My front door is protected with a glass storm door, so my flower will be protected from the weather. However, if your flower will not be protected, you should probably put a couple coats of Mod Podge or a spray on sealer on the front and back sides of your flower to protect all your hard work.)
  3. After the paint has dried, take a black sharpie and outline your flower. I tend to use a series of "dots" and "dashes" to outline my drawings, instead of one continuous line. Do whatever makes you happy. After all, this is your creation and there are no rules here! I also decided to add a scripture verse around the center of my flower.
  4. Next, take a second piece of brown paper that is the same size as the one with the flower on it, and place it underneath that page, making sure to line up the edges. Next, go around the edges of your paper and staple the two sheets together in a few places on each side. This will keep your two pages together and you can cut both pages out at the same time. This will insure that the front and back sides of your decoration are the same size and match up perfectly.
  5. Cut out your flower. (Cutting both pieces out at the same time)
  6. Now you are ready to begin stapling around the edges of your flower. It takes a lot of staples. I tend to put a staple every 1 1/2 to 2 inches. You want to it to stay together and you don't want your stuffing to come out or to have big gaps around your flower. For this particular project, I stapled 2-3 petals, then stuffed those petals with plastic grocery sacks, then stapled a couple more petals and stuffed some more. Continue doing this until you get all the way around your flower. Do not over stuff your flower or it will be hard to staple the edges together.
  7. Finally, attach some festive ribbon to the top 2 petals of your flower and you're done! Hang your beautiful creation on your front door.
Over the past year, I have made several of these easy door decor designs. Here are a few more that made an appearance on my front door this year. Both of the designs below were made out of leftover Christmas wrapping paper, so there was no painting involved! Super easy!
Valentine's Day

St. Patrick's Day

Thank you for joining me on my first official post! I hope you find this project to be fun and easy. The possibilities are endless!

Have a blessed day!