Sunday, November 13, 2011

Plan ahead for Christmas!!

"It's beginning to look a lot like Christmas, everywhere you go..."

Yes, Christmas time will soon be upon us and I wanted to share some great gift ideas that I have done recently. It's not too late for you to get personalized gifts for those you love.


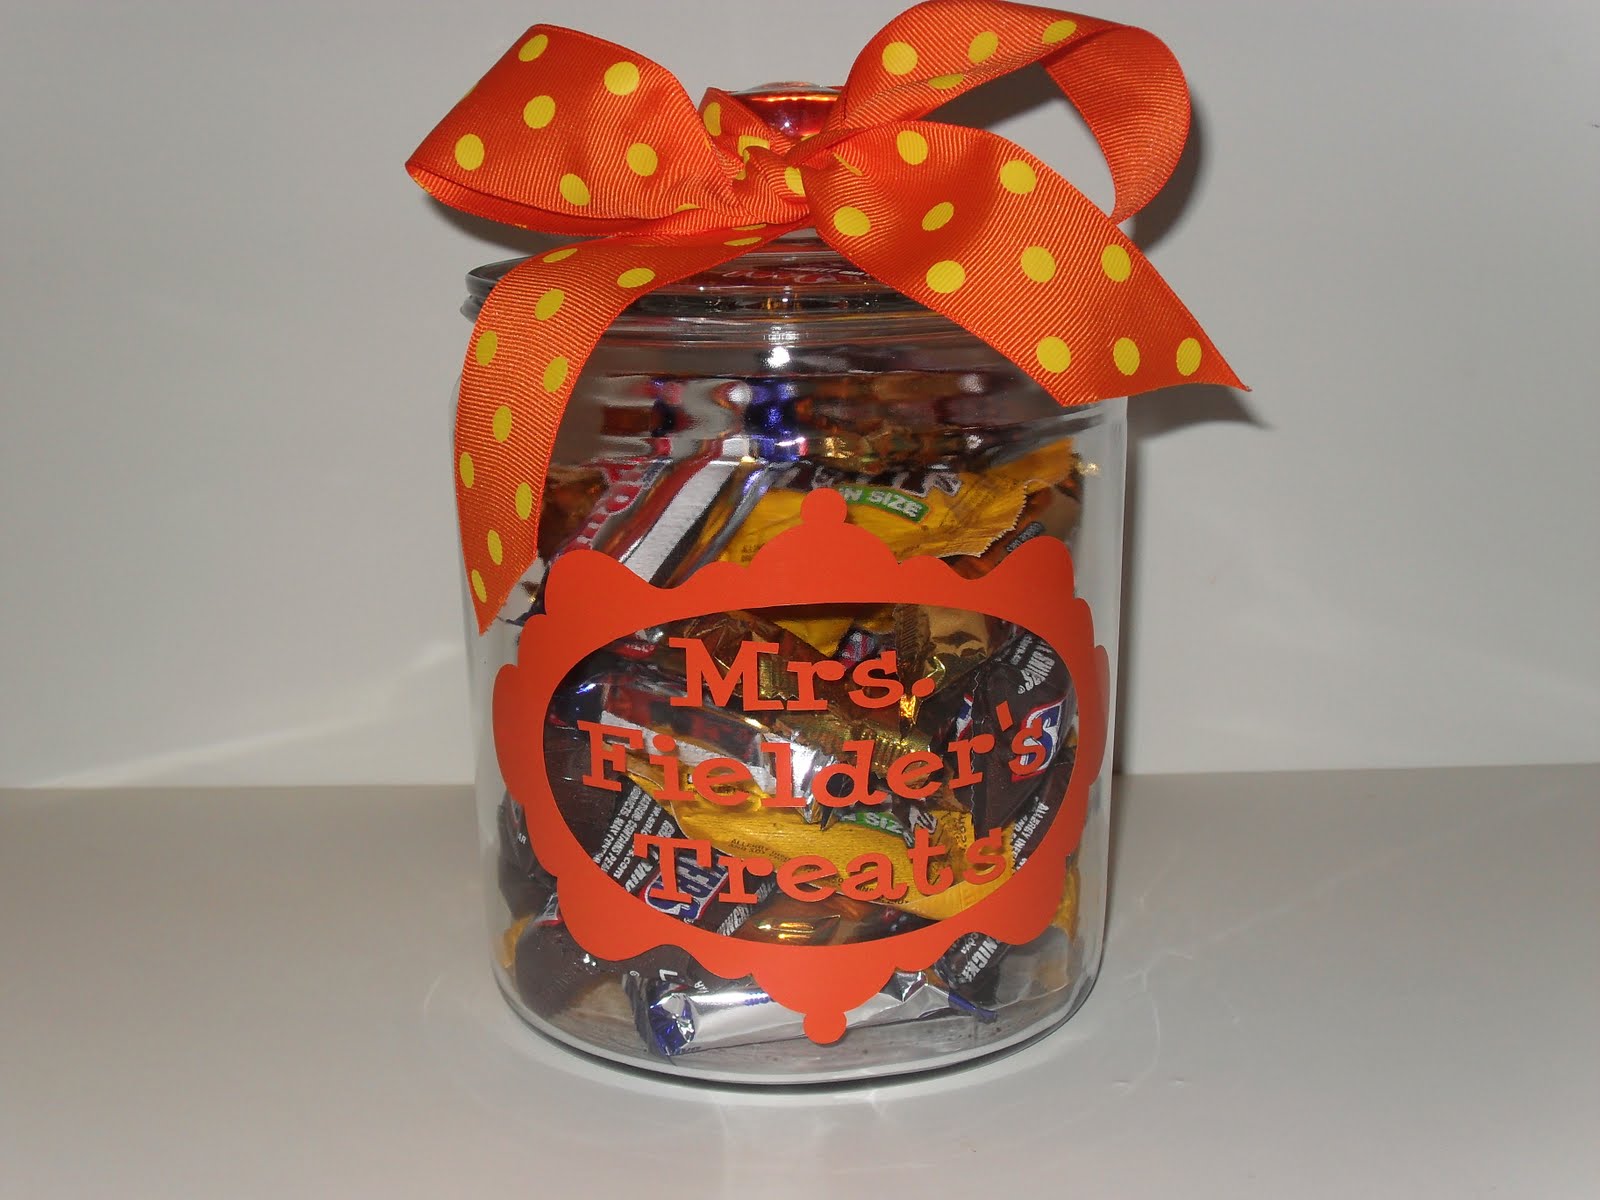
Here are a few items that I just did this afternoon. The treat jars are for some teachers for Christmas and the beverage container is a Christmas gift for my friend's parents.


Here is a close-up of the Teacher Treat Jars. Fill them with your
teacher's favorite goodies and she will think of you all year long!


If you would like for me to monogram a beverage container like this one, I
would be happy to do it for you for just $12.50 (beverage container not included!).
I recently found that Garden Ridge had quite a few different styles of beverage
containers available, if you are looking for one. Bring it to me and I will fix it up!


These one gallon cookie jars make a great gift, whether it's for Christmas, a birthday or a wedding present and they are affordable at only $20 (including personalization).


This beautiful jar is one of my best sellers! It is a 1.5 gallon cookie jar
with a beautiful brushed nickel lid. The monogramming is done in silver
and looks incredible! Get yours today for only $35.


As always, I would be happy to personalize anything that you like. Just email me at: cleverlycreative@gmail.com or call me at (501) 223-9515. I will do my best to meet your needs, even if it's short notice!

Have a blessed day,

Melony
Cleverly Creative Girl

Monday, September 5, 2011

Football Spirit For Your Door

We've got spirit, yes we do!
We've got spirit, how 'bout you?


If you've been in stores or online lately, you've probably seen these cute football door decorations. They're everywhere! About a week, I got together with some of my creative friends, (Stacy, Amanda and Amanda's neighbor) and we made our own footballs. They turned out super cute and were fairly easy to make. They are made out of brown burlap, paint, ribbon, staples and plastic sacks (for stuffing).
Here is a close-up of the one that shows my Razorback support!


I also made one for the school where I teach and my children attend,
Little Rock Christian Academy. Go Warriors!!

I would be happy to make one for your team! They are $25 each.
Just let me know! Football season is here!
Don't forget to show your team spirit!!

Blessings,

Melony
Cleverly Creative Girl

Tuesday, August 16, 2011

Teacher Name Signs

It has been awhile since I did much painting, but I really enjoyed making this little project. This is my second year in the Rainbow Kids Room at my school and I decided I would make a sign for outside our classroom door as a gift for the teacher with whom I work. She loved it and I think it turned out great. The colors are so vibrant and the rainbow fits in perfectly with our theme.

The size of the canvas board is 12 x16. Once I decided on the design, I used a pencil to draw it in. I just used basic acrylic paints to add all the color. Then I used a black paint pen out outline all of the different colors in the painting. That gave it a much more crisp look. Then I added the name in the corner by cutting vinyl on my Silhouette machine. In the past I have had trouble getting the ribbon to attach to the back using hot glue and other options. So, this time I had my handy-dandy hubby use his drill to make two small holes in the top so that I could thread the ribbon through and tie in a bow. It worked great.

Here is a close up of the painting. Sorry that it's a little blurry. I was in a hurry. Again, this was a really fun project and hopefully I will get to make more for other people in the future. If you would be interested in a sign, just let me know. Prices vary based on size and design.

Friday, August 5, 2011

Pink Lemonade Pie

What would summer be without a slice of refreshing Pink Lemonade Pie? It's cold, it's sweet, it's tart all in one. This is such a super simple pie to make and it only takes 4 ingredients!

Here's what you will need:

6 oz. can frozen pink lemonade concentrate (thawed)
14 oz. can sweetened condensed milk
8 oz. Cool Whip, thawed
1 graham cracker crust

Combine first 3 ingredients and pour into crust. Place in freezer to set before serving. Store in freezer.

I often us around 8 oz. of pink lemonade concentrate to make it more tart and I also add a drop or two of red food coloring to make it more pink.

Depending upon the size of your graham cracker crust, you may have some filling left over. The last time I made this pie, I had some left over, so I just poured it into a small bowl and served it with these cute little alphabet and numbers animal cracker-type cookies. It was a big hit. You could also serve it with graham crackers or graham cracker sticks. My kids especially liked eating it as a dip.

Enjoy!

Thursday, August 4, 2011

Customized Clip Boards for Back-to-School

Here is the fun clip board I made for my son to take Back-to-School this fall. This was my first time to work with "mirror" images, so it was a fun adventure, but I think it turned out well. (All lettering is on the back side of the clip board so that the front of the clip board is smooth for writing.) The possibilities are endless with these clear clip boards. I'm currently working on one for my daughter with a "cheerleading" theme. I'll be sure to post the pictures of hers when I get it finished.

If you would be interested in a custom clip board for your child for back to school, just let me know. They are $15. I have just about any color vinyl imaginable and the design/lettering possibilities are endless! I have the clip boards in stock, so I can get it done before school starts.

Wednesday, August 3, 2011

Chocolate Chocolate Chip Sour Cream Pound Cake

Several years back, while we were still living in Alabama near my brother, we went to his house for dinner with friends. For dessert, his assistant from work brought this INCREDIBLE cake. It is unbelievably moist and oh so chocolaty! She graciously shared the recipe with me and it has been a favorite of ours ever since. This recipe truly is my "go to" cake recipe for whenever I need to bring a dessert to work or just need my chocolate fix and don't want to go to a lot of trouble. I know this will surely become a favorite of yours, as well.

Here is what you need:

1 pkg devil's food cake mix
1 (3.9oz) pkg instant chocolate pudding mix
4 large eggs
1 cup sour cream
1/2 cup warm water
1/2 cup vegetable oil
1 pkg. semi sweet miniature chocolate chips

Directions:

1. Preheat oven to 350.

2. Spray bundt pan with cooking spray.

3. Combine everything except the chocolate chips in a large mixing bowl. Mix on low for 1 minute, then increase speed to medium for 2 minutes. Batter will be very thick.

4. Fold in the chocolate chips.

5. Bake for 45-50 minutes. Do not over bake! (If you test with a knife, it may come out covered in chocolate due to all of the chocolate chips in the cake. Just make sure the actual cake batter is done)

6. Allow to cool in the pan for 15 minutes. Then run a knife around the edges of the cake. Turn out onto cake plate. We like to eat it while it's still warm from the oven!

Enjoy!

Teacher Treats

It's that time of year again! Time for all the kiddos (and their teachers) to head back to the classroom. I am gearing up for another year of kindergarten. The kids are so sweet and a lot of fun, but sometimes I just need an afternoon "chocolate break." So, this year I thought I would keep my own stash of chocolaty goodness at my desk...in case of "chocolate" emergencies, of course. Here is the cute little half gallon cookie jar that I decorated. I used my handy dandy Silhouette machine to cut the vinyl design and then just added a fun polka dot ribbon on top.

Next, I went to my local Kroger store and purchased several kinds of my favorite candy that were on sale. Thanks to this cute jar, I will have a special sweet treat to enjoy during my afternoon breaks. Now let's just hope that my own kiddos don't spot the candy and eat it before I even take it to school! Perhaps I'd better hide it...


If you would like for me to make you a cute little jar like this for your child's teacher on the first day of school, just give me a call! (501-223-9515) You can choose your color and design. The cost is $15 and the jar measures 8" high by 5.5" wide. (Candy and ribbon not included).

I will have more Back-To-School gift items posted in the next day or so. Perfect for new teachers, college students and first day of school "happy" gifts. Some of the items I am working on include: customized clip boards, buckets, plastic tubs, etc. As always, I can personalized items that you bring to me, as well. Contact me today for more information.

Monday, July 25, 2011

Pepperoni Rolls

Many, many years ago, a friend served up some delicious pepperoni stuffed rolls at a get together I attended. I believe I asked for the recipe, but for whatever reason, she did not want to part with the recipe. I always wondered how she made them. Over the years, I kept telling myself I was going to try and figure it out. Well, last week, I did just that. This may not be a new recipe to some folks out there, but this was the first time I had ever attempted it. It's super easy and was a HUGE hit with the whole family!

Here is what you will need:

Frozen dinner roll dough
Pepperoni slices, chopped into small pieces
Grated mozzarella cheese
Pizza sauce
1/4 c. Butter, melted
1/2 tsp. Garlic powder
Grated Parmesan cheese

1. Place frozen dough on a cookie sheet sprayed generously with cooking spray. Cover with plastic wrap, that has also been sprayed generously with cooking spray. Allow dough to rise for approx. 3 hours. The dough will be very puffy (see picture above). (Note: try not to place dough balls too close together or they will "grow" together and be harder to get apart for the next step).

2. Take one roll and pull it out, stretching it out in all directions. It will flatten it out.

3. Place 1-2 tablespoons of pepperoni pieces in the center of the dough.

4. Next, top with 1-2 tablespoons of grated mozzarella cheese.

5. Now take the edges of the dough and fold them over the filling. Squeeze the edges together, sealing them closed.

6. It will look like this. (Sorry for the blurry pictures. I'm not a good one-handed photographer!)

7. Place all the rolls in a greased casserole dish and cover with plastic wrap. Allow rolls to rise one hour.

8. Remove plastic wrap and bake at 350 for 18-20 minutes. Rolls should be golden brown.

9. Remove from oven and brush with melted butter, mixed with garlic powder. If desired, sprinkle with Parmesan cheese. Allow to cool approx. 5-7 minutes.

Serve with warmed pizza sauce for dipping.

I plan on experimenting with other pizza toppings. The possibilities are endless! This would also be a fun meal time activity for kids to help with, as well. Enjoy!

Where have I been???

Hello everyone. It's been way too long since I posted anything on my blog. I guess I've been caught up in all the "activities of life." I spent nearly 2 weeks prepping for and recovering from a garage sale. Note to self: Do not plan any more garage sales in the month of July! It was just way too hot! Sales were good up until mid-morning. I think all the bargain shoppers had decided it was too hot to get out as well! But, we did manage to get rid of a lot of "stuff." My closets look great and my garage has never been so clean! Everything that didn't sell, we donated to a local store where the proceeds will benefit the Big Brothers/Big Sisters organization.

Now my mind is buzzing with ideas for Back-To-School teacher gifts. So, stay tuned for that post, coming soon! I am also going to be having a Cleverly Creative Girl inventory sale. I've got several buckets, jars and miscellaneous items that I'd like to clear out (so I can have my dining room back!).

Well, that's all for now. Just wanted to let you know where I've been and what's to come. I may post a recipe later today, as well. Happy Monday everyone!

Tuesday, July 12, 2011

Not just a batch of cookies...


Memories. Life is full of them. When I was young, one of my favorite things to do was to help my mom bake up a batch of chocolate chip cookies. I remember sneaking spoonfuls (or maybe "finger-fulls") of the yummy dough when mom wasn't looking. I remember sitting on the floor in front of the oven and watching the dough magically transform into cookies! I remember how good it made the house smell and how I couldn't wait for them to come out of the oven so I could snatch one up while it was still hot.


Now I'm the mom that's making, or should I say "baking," up some memories with my kiddos. Today I whipped up a batch of chocolate chip cookie dough. Amazing how something so simple brings such pleasure to the life of my children.

Josh enjoying the cookie dough

To some people, it might seem like I am just baking cookies. But, hopefully, when my kids are older, they will look back on days like today, when all we did was make a batch of cookies, and remember the smells, the tastes, laughter and hopefully the love that went into making the cookies. Time and time again, I am reminded that life is short. We only have our children for a short time before they go off into the world and hopefully carry our legacy with them. A legacy of love, life lessons, laughter and most importantly, faith.

It seems as though the days of summer are flying by and soon school will start again. The daily "rat race" of activities and responsibilities will be upon us. Deep sigh. My kids are growing up so fast. I wonder if I'm doing all I can to prepare them for this ever-changing world. Can we ever do enough? We simply must do our best, day to day.

So...today I baked cookies. Cookies that will not only fill up their tummies, but also their hearts and minds with memories of time spent with their mom. Nothing fancy. Just a batch of homemade cookies...


Have you baked up a memory lately?

Chocolate Chip Cookies:

2 sticks butter or margarine, softened
1/2 c. sugar
1/2 c. brown sugar
1 egg
1 tsp. vanilla
2 c. all-purpose flour
1/8 tsp. salt
1/2 tsp. baking soda
1 pkg. semi-sweet chocolate chips

1. In a large mixer, cream butter and both sugars until light and fluffy.
2. Add egg and vanilla and beat until mixed in.
3. Add flour, soda and salt a little at a time, until fully incorporated.
4. Add bag of chocolate chips and mix well.
5. Drop by heaping spoonfuls onto greased cookie sheets.
6. Bake at 350 for approx. 13 minutes or until lightly golden.
7. Enjoy!

Monday, July 11, 2011

Arkansas Sales Tax Holiday!!!

Attention Shoppers!! Grab your wallets and your purses! Arkansas is FINALLY have a sales tax holiday!! And it's just in time for all those Back-To-School purchases! Mark your calendars for Saturday, August 6th and Sunday, August 7th.

Here's the info:

Arkansas will hold its first annual sales tax holiday, beginning Saturday, August 6, 2011 at 12:01 a.m. and ending the Sunday, August 7, 2011 at 11:59 p.m.. State and local sales tax will not be collected during this 48-hour period on the sale of: (1) Clothing and footwear if the sales price is less than one hundred dollars ($100) per item; (2) Clothing accessories and equipment if the sales price is less than fifty dollars ($50) per item; (3) School supplies; (4) School art supplies; and (5) School instructional materials.

Use this link to see the extensive list of items that qualify for the sales tax holiday.

For more information, contact a customer service representative by phone Monday through Friday from 8:00 a.m. to 4:30 p.m. at (501) 682-7104.

Happy Shopping! =)

Tuesday, July 5, 2011

Sausage & Egg Casserole


Everyone loves a good, quick breakfast casserole and this recipe has become a favorite in our household. I changed up the original recipe a bit to suit our family's taste. It's great for breakfast, brunch or even "breakfast for dinner" nights.

What you will need:

6 slices white bread, cut into bite-size pieces
1 lb. bulk sausage (I use Jimmy Dean mild sausage)
1 bag frozen bell peppers and onions mix (I use Kroger brand 3-pepper and onion), chopped
2 cups shredded sharp cheddar cheese
6 eggs
2 cups milk
1 tsp. salt (I think I use less)
1/4 tsp. pepper

1. Preheat oven to 350 degrees.

2. Fry sausage and (chopped) bell pepper/onion mixture in large skillet. Drain off grease.

3. Place bread pieces in bottom of 9x13 casserole dish that has been sprayed with cooking spray.

4. Top with cooked sausage and pepper/onion mixture.

5. Add cheese on top of sausage mixture.

6. Beat eggs, milk, salt and pepper with whisk until well blended. Pour over all the ingredients in your casserole dish.

7. Bake for 40-45 minutes or until casserole is lightly browned and the center is set.

8. Serve hot with fresh fruit. Enjoy!

Note: When it comes out of the oven, it will be puffed up. As it cools it will "deflate" a bit, but it still tastes great.

(In the future, I plan to try this recipe and substitute shredded hashbrowns for the bread. I haven't tried it yet, but I think it would be great!)

Happy Breakfast!!

Friday, July 1, 2011

Let's Party!

One thing I LOVE to do is throw a fun party! In this case, it was my daughter's birthday. She decided to have a pool party and go with a Hawaiian theme. Thankfully the weather cooperated. I was worried because the day before the party, it rained all day! But, we had bright sunshine and HOT temperatures...perfect for a pool party.

Now normally when I plan a party, I plan it for weeks and have ev
erything ready to go, but this time was different. Due to scheduling issues with the pool, the party had to be 2 days after we got back from vacation! Yikes! (Note to self: don't plan a party for 2 days after you get back from a trip!) But, you do what you gotta do and it all turned out fine. Of course the perfectionist in me wanted to do so much more, but there just wasn't time. All in all, I think it turned out well and everyone seemed to have a good time. I thought I would go ahead and share some of my decorating ideas with you from the party. Nothing too fancy, mind you. Just "festive."

Here is a quick door sign I made. I literally whipped it up in a few minutes. I simply used a 12x16 canvas board, taped off areas to paint different colors, added polka dots with a large round sponge brush and added "Happy Birthday" in black vinyl letters that I cut with my Silhouette. Then I just added a ribbon to the back to use as a door hanger. The bright colors show up great from the street. I hung it out there a few days before the actual party. I chose not to put her name on the sign, so that I can reuse the sign for each family members' birthday week.

My next project was to try my hand at making tissue paper flower balls. I had never made them before, so decided to Google it and I found several You Tube videos that showed me exactly what to do. I tried to find the video tutorial that I used, but I was unable to find that specific one again. But, any tutorial you find will give you the instructions that you need. I used 10 sheets of tissue paper to make mine nice and full and I cut the edges of mine to a point (while still folded together), for a fun look. They were a little time consuming to make, but I just love what they added to the decor.

Having thrown several luau/Hawaiian themed parties in the past, I have lots of serving pieces, linens, etc that fit that theme. Which was good, since I was on a tight budge for this party! The grass skirt under the table cloth is actually a twin size bed skirt that goes with some Hawaiian bedding my daughter used to use when she was younger. It's the perfect size for my island! The "table cloth" is actually the twin flat sheet from the same bedding set. Yes, I said bed sheet! Why not? It had the perfect design and I already had it on hand.

I always like to try and challenge myself to see how much I can use from what I already have. I also kind of like the "mix and match" look. Nothing to "matchy-matchy." When I buy serving pieces, bowls, baskets, cloth napkins, etc, I try to buy things in fun colors that will work for a number of holidays or themes. I especially love reds, pinks, lime green and oranges. I love to use baskets with cloth napkins in them for serving pieces, especially for chips, bread, silverware or napkin holders, etc. The fun floral plates on the island came from Target years ago, and actually belonged to my sister-in-law, Terri. She put them in a garage sale we were having together and I snatched them up. I already have a hot pink set, but I knew the white set would come in handy too! (I know, I think I have a dish fetish!!) I'm sorry that the rest of the decorations/serving pieces didn't show up well in my pictures. Don't you hate it when you think you take enough pictures and you discover after the fact, that you didn't!!


Other fun serving pieces are buckets. Buckets in all sizes and colors. This little orange bucket came from the dollar spot at Target. (Love the dollar spot!) I simply added a hot pink and orange gingham cloth napkin and some bright turquoise plastic flatware for a splash of color.

I also love my white ribbon plate! I got it years ago, back when I was a Southern Living at Home rep. I wrapped a variety of pattern ribbons around the edge through the years. It's just such a fun plate and you can use dry erase markers to write a greeting or your menu. Too fun. Everyone should have one!


For party favors for the girls, I bought these fun tumblers at Target and used orange vinyl to put the girls' names on the cups. Then my daughter simply filled them with some of her favorite candy. Easy-peasy!

I didn't make the cake this time, but it was so cute, I thought I would show it to you anyway. Normally I made petite fours for my daughter's birthday, but I knew that just wasn't in the cards for this party. Thankfully she was fine with that and we happened to find this cake at Sam's that was perfect for our theme. It was so good and easy on the budget, too! Sweet!

Well, that's all I have for now. Like I said, this party was a little scaled back from what I normally like to do, but everyone seemed to have a good time. I hope you found this helpful and that perhaps you were able to get a few ideas from it. Thanks for taking the time to ready my post.

Have a great day,
Melony


Monday, June 27, 2011

Fruit Dip


While at Kroger this morning, I came across some beautiful, bright red strawberries. I immediately decided to pick up the ingredients to make my favorite fruit dip. It's so simple. Only 3 ingredients. Great with any fruit.

Here's what you need:

8 oz. cream cheese
7 oz. marshmallow cream
2-3 Tbs. orange juice

1. Soften cream cheese in a bowl in the microwave (approx. 45-60 seconds). Stir well until it's smooth and has no lumps.

2. Next, put the jar of marshmallow cream in the microwave and heat until it puffs up out of the jar an inch or 2. Remove from microwave and carefully add to the softened cream cheese.

3. Finally, add orange juice and stir well.

4. Refrigerate for approx. 1 hour or until it thickens up more.

5. Serve with your favorite fruit!

Enjoy!

Friday, June 17, 2011

Last Minute Father's Day Door Decor

Hey Y'all,

I can't stop making these quick and easy door decorations!! I was thinking about what I wanted to do for Father's Day this Sunday and I thought it would be fun to make something to go on my front door. So, once again, I turned to the quick and easy door decorations I've been making, as detailed in this post. What better to make for Father's Day than a giant tie!

Here are some pictures I took as I made this giant tie:


1. Take a piece of brown packing paper and fold it in half. Draw out the shape of a tie. Paint the tie your base color. In this case, I used a Leaf Green acrylic paint. Allow to dry.

2. Next, paint a design on your tie. I chose to paint big orange polka dots on my tie. Then you want to outline the tie with black paint.

3. Then I designed and cut out vinyl letters on my Silhouette machine that say "Happy Father's Day." If you do not have a cutting machine, you could simply paint the words on your tie or even use large stickers that you get at any craft store.

4. Cut out the tie, being sure to cut out both layers of paper at the same time. Then begin stapling the sides together until you work your way around the tie. Leave one side unstapled. Then stuff it with extra paper, grocery sacks, etc. Here I used the scraps that were left over from cutting out the tie. Waste not, want not! Then finish stapling up the tie.

5. Next attach a wire loop to the back of the tie (at the top) so that you can hang it on your door.

And there you go! A super easy (and inexpensive) Father's Day door decoration!

Happy Father's Day to all the Dads out there!

Monday, June 13, 2011

Monogram Wall Art


Now that school is out and I'm off work for the summer, I intend on making up for all the lost creative time during the school year. This may be my new favorite thing! This was my first attempt at painting something with a zebra print. Before today, I probably hadn't done any painting since before Christmas. Since I got my new favorite "toy" (aka Silhouette machine) a few months back, I've been monogramming all sorts of things. I decided that the walls in my bedroom needed a little something that was "fun," so I decided to try out this little project.

For this project, you will need:

12 x 16 canvas board
acrylic paints (I used Black and Caribbean Blue)
blue painters tape
paint brushes in various sizes
Silhouette machine
black vinyl
ribbon
ruler

1. Use your Silhouette machine to design and cut out your monogram. I made my monogram approximately 8" x 10.5". Peel off the negative space and transfer monogram to transfer paper. Set aside to use later in the project.

2. Tape off the borders of your canvas with blue painters tape so that you can paint the inside block a single color. I used Caribbean Blue. I made my borders 2" wide on the short sides and 1.5" inches on the long sides.

3. Paint the inside block of the canvas your desired color. Allow to dry and repeat with a second coat. Allow to dry completely and remove blue painters tape.

4. Next, lightly draw your desired design around your border. In this case, I drew zebra stripes.

5. Apply blue painters tape to the inside edge of your border. You will be putting the painters tape temporarily on top of the color you painted in the center earlier. Using painters tape will give you a clean, crisp edge for your border print.

6. Paint out your border design. In this case, I used black paint. This design is a little time consuming, but I love the effect. Allow to dry completely and remove the blue painters tape. Do any touch ups that are necessary.

7. Apply the monogram to the center of the canvas board, making sure that it is centered on all sides.

8. Attach some fun ribbon to the back as a hanger and you're done!


If this is too much work for you or not your cup of tea, I am selling these customized wall art pieces for $40. You can choose your colors and your border design (zebra, stripes, polka dots, etc). You can also put your name (first or last) instead of the monogram, if you choose. It is completely customizable. Just send me a quick email to melony.fielder@sbcglobal.net and I'll contact you to place your order!

Keep on creating!
Melony

Live All In

A few weeks ago, our church learned that one of our teaching pastors would be leaving to take a job with another church in California. While we are very sad that they will be moving away, I was struck by his obedience to God and God's will for his life, no matter the cost. A couple weeks ago, he delivered his final sermon at Fellowship. He talked about living "All In" for God, no matter where that may take you or no matter the cost.

He challenged us to look and see if our living is all about Jesus, or do we compartmentalize Jesus to certain areas of our life. Are we willing to serve and speak the Truth to others, no mater the cost? Are we committed to "doing life" in relationships with others? He reminded me that the greatest investment we will ever make is in people. Being in the lives of people, not just passing through. I wonder if sometimes I feel I am too busy, or afraid of rejection or sadly maybe even too lazy to really invest in the lives of the people God has placed around me. Then I wonder why it is that I feel alone at times. He encouraged us to love people enough, that when you have to leave them, you cry.

As I examine my life, I realize that I have not been living "all in." It's easy to make excuses for why we don't do this or that. But excuses do not matter to God. God didn't just ask us to "start," He asked us to "finish" the course. Are you living "All In" for Jesus? Are you invested in the lives of the people God has placed in your life? Are you willing to follow where Jesus calls you, no matter the cost? I have challenged myself to really start to "Live All In" for Jesus. I need to be more present in my life. Listening to Jesus' voice. Are you listening? Where is he calling you?


To remind myself that I want to "Live All In," I made this simple wall art. It's nothing fancy, but I'm hanging it just outside my closet, so that I will see it every morning when I get up. It will serve as a reminder to me of the re-commitment I want to make in my life, to Jesus and to those around me.

Have a blessed day everyone!
Melony